If you’re a snowmobiler what does the word “suspension” mean to you? I can’t hear your answer, but I’m guessing it either means frustrating or awesome to you depending on what side of the ride quality and handling you are on.
Being new to cross country terrain racing, Emily and I have both had steep learning curves when it comes to suspension setups. We come from a background of lakecross lemans road course style ice racing, and like many fellow snowmobilers, also have a lot of trail riding experience. As soon as we hit the track cross country terrain racing, the added intensity of racing has really exposed our balance deficiencies in setup.
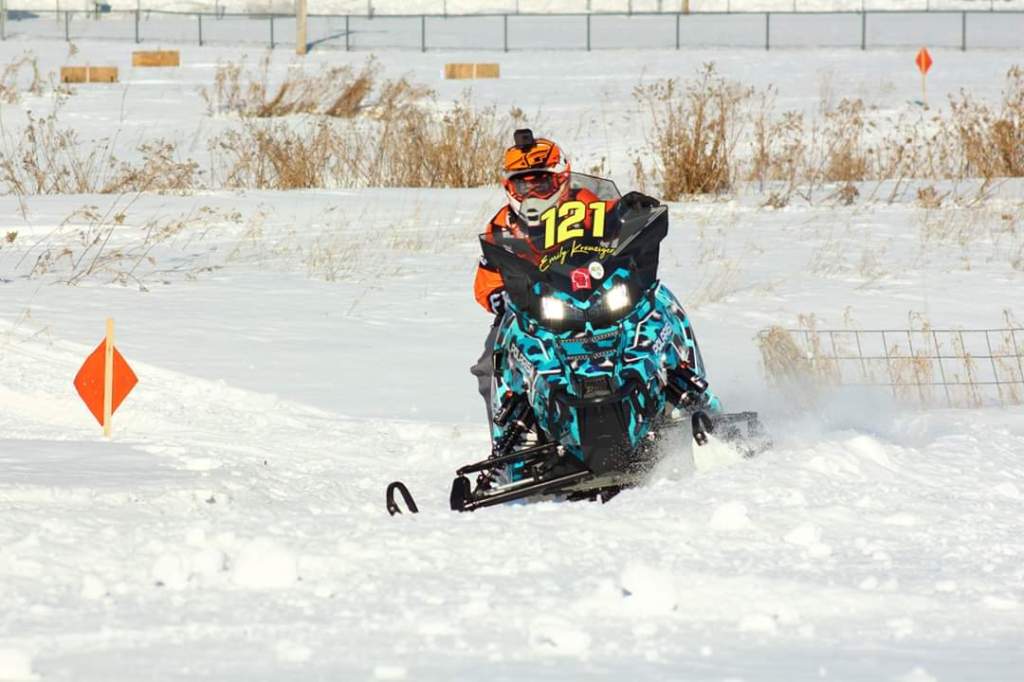
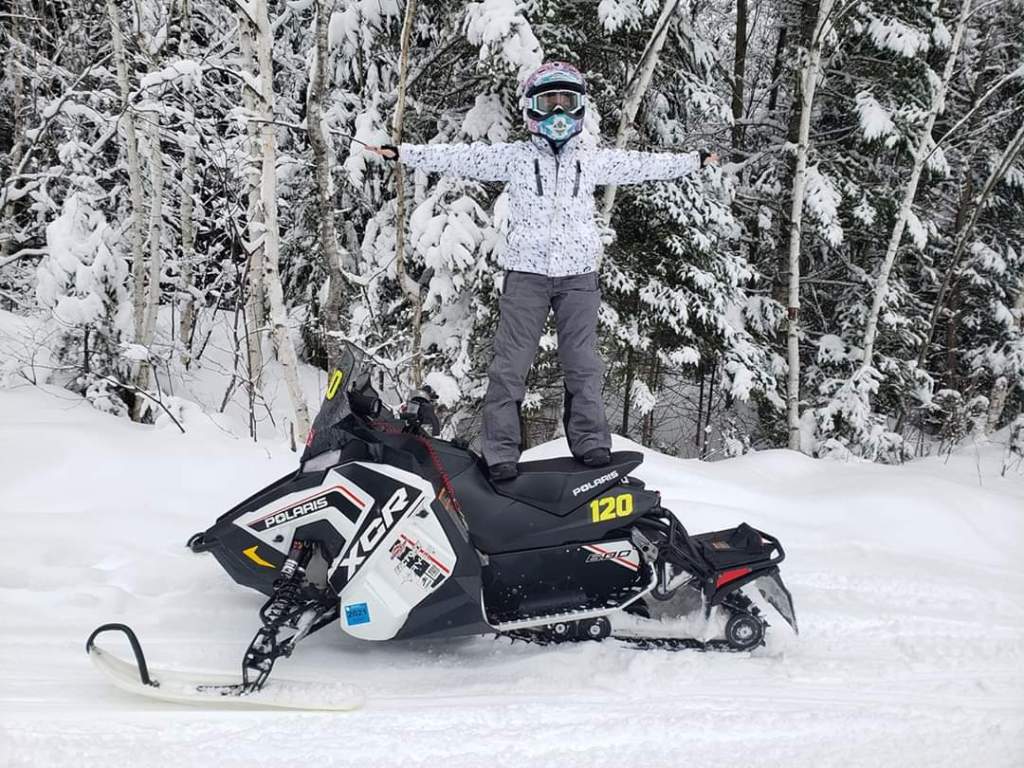
In this blog post I will focus on Emily’s 2018 Polaris 600 Rush XCR. In a future blog post I will dive into my suspension set up upgrades and changes. To more focus this blog post, we will just stick to Emily’s Polaris XCR.
We started the 2019/2020 winter with high hopes. We had received a lot of advice and we used that information, combined with my racing the sled the season before in a Cor Powersports Dubuque, Iowa ski hill race in 2019. In 2019, Emily was pregnant with our daughter Maddie, and to help her get a jump on the sleds setup, I decided to race it myself that season for one race. While racing her sled, I found it gave a lot of feedback through the handlebars in the rough sections from running the stiffer sway bar Polaris makes for this chassis. I had decided to make the sled work with the lighter sway bar as goal number one for the 2019/2020 season. We decided to leave the Walker Evans shock valving stock to first utilize the stock clicker adjustments to see if they would work for Emily. The Walker Evans shocks on the XCR Rush have both high and low speed compression adjusters. We had a list of recommended preloads for each spring and one spring rate change to try on the rear shock. I also wanted to try some different rear limiter strap adjustments. We even went so far as to get my dad’s skid loader and built a test track in the field just outside of our garage, the idea being we can test and then tune right from our garage if need be for more extensive setup changes. We also had a couple of different trail riding trips where we tried different preloads and shock settings and limiter strap lengths. We found out through all of our testing, trail rides, and the Hayward Cor Powersports race that Emily’s set up just was not working for her to the level Emily needed it to.
So as soon as the season ended short due to COVID, I immediately starting trying to figure out what it was we had so far off on Emily’s suspension set up. I started to wonder if the fact that the sled seemed so perched up at the top of the suspension travel for her was causing both cornering and bump compliance issues. If you watch the practice video that is attached to this blog you will see Emily is not using much of the travel. Through further studying film of her riding, getting more feedback from Emily, and researching on the internet of other riders issues they’ve ran into, I started to feel like we started to pinpoint issues that were causing the lack of bump compliance and poor cornering.
All these problems was what started a long search of solutions. As you all know, it’s easy to know the problems, but it’s much more complicated finding solutions. At some point watching an off-road truck race on TV, Emily said to me, “My sled needs to land like those trucks with no bounce. I always feel like my sled is trying to buck me off when I land and there’s not softness.” I completely agreed with her. I was curious, how in the world do those heavy trucks land with such control and grace? I had been seeing some people on online forums saying dual spring setups and even triple rate single springs were helping their snowmobiles. In a quick off-road racing search I found dual springs with a lock out ring being very common place in the trucks, UTVs, and ATVs for both off-road racing and riding.
That gets to us where we’ve arrived today. I finally found a video on dual springs for snowmobiles that actually explains how they work. I had seen one other video showing a dual rate spring and shock in a shock dyno, but I had yet to see any experts actually explain it on a YouTube video for snowmobiles. I had seen a lot of videos of off-road dirt vehicles like ATVs and UTVs with explanations, but nothing really note worthy on sleds. That was until this last July I finally saw a snowmobile video about dual spring technology, the way it works, and how it can be customized to your wants and needs. The video I found was from Accelerated Technologies, a suspension company in Canada. I immediately knew I needed to contact them and see if they could help us.
Without getting into too many details, John from Accelerated Technologies really listened to us and gave us a lot of feedback. He even watched our practice videos and he requested some shop videos to help show our current shock valving range. He also taught us the correct way to measure the suspension sag of a snowmobile. He took time to explain what all of our info we provided would mean as far as options we could go with to meet our wants and our budget.
Emily decided based off of all the options and information that we would go with the Elka Stage 5 kit with her snowmobile. With the Elka Stage 5 kit you get adjustable high and low speed compression and adjustable rebound for all 4 of the shocks. The ski shocks and the center or front track shock get dual springs with a crossover ring. The rear shock gets a single rate spring thats also gets matched to the rest of the setup. The best way to explain the process of working with Accelerated Technologies to get an Elka suspension setup is that you give them input as far as what you want out of the sled and issues that you face currently. All of your input is taken into account. What does that mean? This means that instead of buying a generic valved shock that you often end up sending to someone else to revalve, Elka Shocks come right from the factory custom valved for your wants and needs!
I want to talk more about the dual springs. You’re probably wondering what are the advantages of them? The biggest advantage is that it provides an almost infinite amount of spring rate options. You can get dual rate springs that come in one long spring, but the problem is that it’s so specialized in its production that you can’t really get many options for a single spring that is dual rate. The advantage of the dual spring set up is that you can stack two springs together and come up with nearly any combination you want. First off I have to explain that when you stack two springs on top of each other the combined rate is softer. There is a simple formula to calculate what your final rate will be. This allows you to customize your spring rate without having to have a special spring. This next part is really key to this dual spring set up working. There is what you call a crossover ring. A crossover ring connects the top and bottom spring. So you have a longer main spring on the bottom and on top of that you run a shorter tender spring. The crossover ring is very simple in that what it does is it locks out the tender spring at whatever point you want it to in the travel. Once the tender spring is locked out, your main spring becomes the rate at which you’re now running. I will give you an example. Let’s say previously on the ski shocks you ran a single rate 120 pounds per inch rate spring. Now let’s just say your new dual spring and dual rate setup is 85 and 140 pounds per inch. Then let’s say our crossover ring is set up to make the first half of the travel the 85 rate. The crossover rings can be made to different heights which determine when you change rates. When the tender spring bottoms out on the crossover ring you will in the second half of the travel only be using the main spring. Then your rate will be the 140 rate of the main spring. You’re probably asking what is the point of all of this? Essentially what you are doing is layering the suspension. This offers numerous advantages. The first advantage is in bump compliance or commonly known as ride quality. The snowmobile will now have a softer more compliant ride early in the travel and then later in the travel you will have more bottoming out resistance. We make the shock have more range of compliance than stock by being softer than the stock set up at the beginning of the travel and then stiffer than stock on the later part of the travel. The other advantage is cornering. Often newer snowmobiles have a higher ride height which increases the roll center or in simple terms makes the sled more tippy getting up on one ski when cornering. By going softer in the initial travel, you lower the sled’s ride height which helps lower the center of gravity and in turn helps the cornering. The stiffer part of the travel helps keep the front end planted in hard cornering. The other question you probably have is whether that sacrifices your suspension travel by lowering the snowmobile? This is where I previously went off the rails and most riders misunderstand shock travel. Often the assumption is that we need to be at the top of the travel when the sled is sitting on the ground with no rider on it. We think,, well I have all that travel and only way I can use it is that it sits at the top of the travel. Thats where we misunderstand suspension and start to have a lot of balance issues. John from Accelerated Technologies has helped educate me that the snowmobile needs to have negative travel. What does negative travel mean? This in application means that the shock more reaches out for bumps instead of bouncing off of bumps. The snowmobile with negative travel is absorbing bumps that you don’t even know are there because it’s better following the terrain. This in turn means better traction and control. To be able to tell if your setup has negative travel, you need to know the static sag, which is the amount the snowmobile sags or drops under its own weight with no rider on it. To measure static sag you need to know the extended length of the suspension. The shocks have to be fully extended to measure the extended length. The difference between the extended length and the height of the sled sitting with its own weight is static sag. You also have your rider sag to measure which is the height with the rider seated on the sled. I’m not going to break all of the sag numbers down in this blog but I just wanted to give you a brief example and explanation of common misunderstandings we have with suspension setups due to our misconceptions.
I know that was a lot of info to process, but I wanted to share this adventure of suspension setup with all of you. I actually came up with the idea of doing blog posts to be able to better articulate my thoughts to all of you. I enjoy doing videos, but between capturing the correct words spoken and editing the footage, I often fall short of sharing information I can better explain in written words. This is a first attempt at seeing how blog posts work and if it is indeed another good option to connect with fans. Let me know what you think of my first blog post!
This winter Emily will be running this new set up and she couldn’t be more excited to try it out! As always, stayed tuned for further updates and we will let you know what we learn about this new suspension set up for Emily!


Great job with the blog Joel and Emily. Even I could understand what you are conveying and my old back is thinking why didn’t I have a setup like that back in the day. Way too many miles on sleds with leaf springs, they were the speed limiters. Wishing Team Kreuziger Racing great success this season. Nice racing with the Wind T-shirt in videos.
LikeLike